
在 Hexo 中有两份主要的配置文件,其名称都是 _config.yml。 其中,一份位于站点根目录下,主要包含 Hexo 本身的配置;另一份位于主题目录下,这份配置由主题作者提供,主要用于配置主题相关的选项。为了描述方便,在以下说明中,将前者称为 网站配置文件, 后者称为 主题配置文件。
目录
主要包括以下高级使用:
- 更换主题
- 更改头像
- 设置Menu
- 侧边栏社交信息设置
- 摘要自动生成
- 主页文章添加阴影效果
- 添加字数统计、阅读时长
- 修改底部标签样式
- 文章底部添加版权信息
- 设置动态背景
- 添加网页进度加载条
- 底部隐藏由Hexo强力驱动、主题--NexT.Mist
- 显示当前浏览进度
- 设置网站的图标Favicon
- Hexo博客添加站内搜索
- 修改markdown解释之后标题的字号的大小
- 更换markdown解析和渲染插件---hexo-renderer-markdown-it 插件
1. 更换主题
网络上有很多hexo相关的主题,只要把相应的主题文件下载下来,放到theme目录中,然后修改网站配置文件_config.yml中theme字段的值。下面是以安装next主题为例
- 切换到Blog文件夹下(就是
hexo init的文件夹),查看文件
$ cd [Blog]
$ ls
_config.yml node_modules    scaffolds   themes
db.json     package.json    source
- 通过curl安装NexT
$ mkdir themes/next
$ curl -s https://api.github.com/repos/iissnan/hexo-theme-next/releases/latest | grep tarball_url | cut -d '"' -f 4 | wget -i - -O- | tar -zx -C themes/next --strip-components=1
- 更新主题NexT
$ cd themes/next
$ git pull
- 编辑网站配置文件
_config.yml文件,切换成Next主题
## Themes: https://hexo.io/themes/
#theme: landscape
theme: next
- next现在有4种主题风格,可以通过修改主题配置文件中的
scheme值,来选择一款自己喜欢的主题风格。
# Schemes
scheme: Muse  //默认主题
#scheme: Mist
#scheme: Pisces
#scheme: Gemini
完成上述操作之后,用hexo clean命令清除下缓存,之后hexo g生成静态网页,可以通过hexo s来进行预览。
next主题的安装和配置可参考nexT主题官方文档,nexT github官网中文文档
2. 更改头像
编辑主题配置文件,修改 avatar, 值设置成头像的链接地址。其中,头像的链接地址可以是:
| 地址 | 值 |
|---|---|
| 完整的互联网 URI | http://example.com/avatar.png |
| 站点内的地址 | 将头像放置主题目录下的 source/uploads/ (新建 uploads 目录若不存在) 配置为:avatar: /uploads/avatar.png 或者放置在 source/images/ 目录下配置为:avatar: /images/avatar.png |
3. 设置Menu
menu是如下图所示的导航栏

- 默认的只有首页和归档两个,但是可以通过修改主题配置文件
_config.yml来添加menu 项,menu配置项中上下的顺序决定了menu显示的顺序。
# When running the site in a subdirectory (e.g. domain.tld/blog), remove the leading slash (/archives -> archives)
menu:
  home: /
  category: /categories/
  archives: /archives/
  tags: /tags/
  about: /about/
  #sitemap: /sitemap.xml
  #commonweal: /404/
- 当选择添加
tags之后,还需要创建相应的文件,命令如下
$ hexo new page "tags"
- 最后编辑创建index.md文件,内容如下
---
title: All tags
date: 2018-01-20 18:57:48
type: "tags"
---
假如只对主题配置文件进行了修改,即只添加了tagsmenu项,不创建相应的文件,当在博客网站点击标签菜单可能会提示
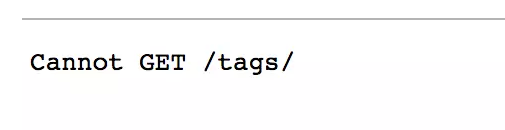
其他Menu选项也同理创建,如categories项目、about项。添加categories项之后,创建的文件内容填写如下
---
title: All categories
date: 2018-01-20 18:57:48
type: "categories"
---
添加about选项之后,创建的文件内容可以随意。
4. 侧边栏社交信息设置
编辑主题配置文件_config.yml,修改social字段的值
# Social Links
# Key is the link label showing to end users.
# Value is the target link (E.g. GitHub: https://github.com/iissnan)
social:
#LinkLabel: Link
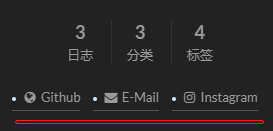
Github: https://github.com/yourgithub
E-Mail: mailto:dawnxu96@gmail.com
Instagram: https://instagram.com/yourins
效果如下
5. 摘要自动生成
编辑主题配置文件_config.yml,修改auto_excerpt字段
# Automatically Excerpt. Not recommend.
# Please use <!-- more --> in the post to control excerpt accurately.
auto_excerpt:
  enable: true	# 置为true则自动截取100字当做首页摘要
  length: 100	# 自动截取的字数
上述的方式并不推荐,推荐是手动设置文章摘要,手动设置文章摘要,我们只需在想显示为摘要的内容之后添 <!-- more --> 即可。像下面这样:
---
title: hello hexo markdown
date: 2016-11-16 18:11:25
tags:
- hello
- hexo
- markdown
---

我是短小精悍的文章摘要(๑•̀ㅂ•́)و✧

<!-- more -->

紧接着文章摘要的正文内容
6. 主页文章添加阴影效果
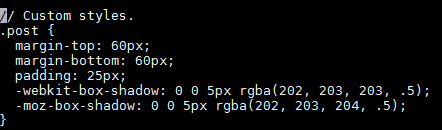
打开.\themes\next\source\css\_custom\custom.styl,添加以下代码:
// 主页文章添加阴影效果
.post {
    margin-top: 60px;
    margin-bottom: 60px;
    padding: 25px;
    -webkit-box-shadow: 0 0 5px rgba(202, 203, 203, .5);
    -moz-box-shadow: 0 0 5px rgba(202, 203, 204, .5);
}
7. 添加字数统计、阅读时长
- NexT 主题默认已经集成了文章【字数统计】、【阅读时长】统计功能,如果我们需要使用,只需要在主题配置文件
_config.yml中打开 wordcount 统计功能即可。如下所示:
# Post wordcount display settings
# Dependencies: https://github.com/willin/hexo-wordcount
post_wordcount:
  item_text: true
  wordcount: true         # 单篇 字数统计
  min2read: true          # 单篇 阅读时长
  separated_meta: true
- 如果启动服务出现字数统计和阅读时长失效的情况,一般是因为没有安装 hexo-wordcount 插件,可以先安装该插件:
npm i --save hexo-wordcount
Node 版本 7.6.0 之前,请安装 2.x 版本 (Node.js v7.6.0 and previous) ,安装命令如下:
npm install hexo-wordcount@2 --save
- 安装完成后,重新执行启动服务预览就可以了。
参考博客:Hexo添加字数统计、阅读时长
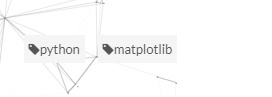
8. 修改底部标签样式
修改.\themes\next\layout\_macro\post.swig中文件,搜索rel="tag">#,将#替换成<i class="fa fa-tag"></i>。

效果如下
9. 文章底部添加版权信息
修改主题配置文件_config.yml中字段的值为true即可。
# Declare license on posts
post_copyright:
  enable: true
  license: CC BY-NC-SA 3.0
  license_url: https://creativecommons.org/licenses/by-nc-sa/3.0/
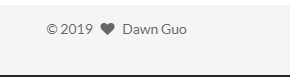
效果图如下

10. 设置动态背景
在主题配置文件中找到canvas_nest,设置成ture就可以啦,当然假如你想要其他样式,那么只要设置该样式为true即可。
# Canvas-nest
canvas_nest: true

# three_waves
three_waves: false

# canvas_lines
canvas_lines: false

# canvas_sphere
canvas_sphere: false

# Only fit scheme Pisces
# Canvas-ribbon
canvas_ribbon: false
11. 添加网页进度加载条
编辑主题配置文件,搜索pace,将其值改为ture就可以,之后选择一款你喜欢的样式即可。
# Progress bar in the top during page loading.
pace: true
# Themes list:
#pace-theme-big-counter
#pace-theme-bounce
#pace-theme-barber-shop
#pace-theme-center-atom
#pace-theme-center-circle
#pace-theme-center-radar
#pace-theme-center-simple
#pace-theme-corner-indicator
#pace-theme-fill-left
#pace-theme-flash
#pace-theme-loading-bar
#pace-theme-mac-osx
#pace-theme-minimal
# For example
# pace_theme: pace-theme-center-simple
pace_theme: pace-theme-minimal
添加网页进度加载选项之后,效果如下

12. 底部隐藏由Hexo强力驱动、主题--NexT.Mist
-
方法1
直接修改主题配置文件
_config.yml中的copyright配置项为false,假如没有该配置项,可以通过方法2# Footer `powered-by` and `theme-info` copyright copyright: false -
方法2
打开
./themes/next/layout/_partials/footer.swig,注释掉相应代码// 用下面的符号注释,注释代码用下面括号括起来 // <!-- --> <!-- {% if theme.copyright %} <div class="powered-by"> {{ __('footer.powered', '<a class="theme-link" href="https://hexo.io">Hexo</a>') }} </div> <div class="theme-info"> {{ __('footer.theme') }} - <a class="theme-link" href="https://github.com/iissnan/hexo-theme-next"> NexT.{{ theme.scheme }} </a> </div> {% endif %} -->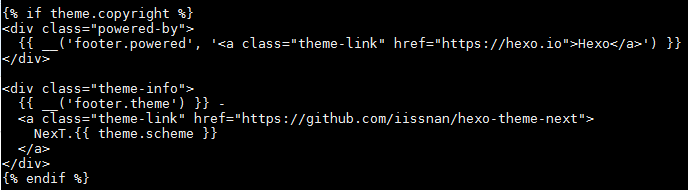
修改之后效果如下
13. 显示当前浏览进度
修改themes/next/_config.yml,把 false 改为 true:
# Back to top in sidebar
b2t: true

# Scroll percent label in b2t button
scrollpercent: true
效果如下

14. 设置网站的图标Favicon

- 之后修改主题配置文件
_config.yml中的favicon配置项,指定图标所在路径即可
# Put your favicon.ico into `hexo-site/source/` directory.
favicon: /favicon-32x32.png
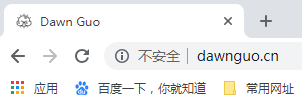
效果如下:
15. Hexo博客添加站内搜索
NexT主题支持集成 Swiftype、 微搜索、Local Search 和 Algolia。下面介绍Local Search的安装。
- 安装 hexo-generator-search
$ npm install hexo-generator-search --save
- 安装 hexo-generator-searchdb
$ npm install hexo-generator-searchdb --save
- 编辑主题配置文件,设置
local_searchenable为true
# Local search
# Dependencies: https://github.com/flashlab/hexo-generator-search
local_search:
  enable: true
  # if auto, trigger search by changing input
  # if manual, trigger search by pressing enter key or search button
  trigger: auto
  # show top n results per article, show all results by setting to -1
  top_n_per_article: 1
添加之后Menu如下

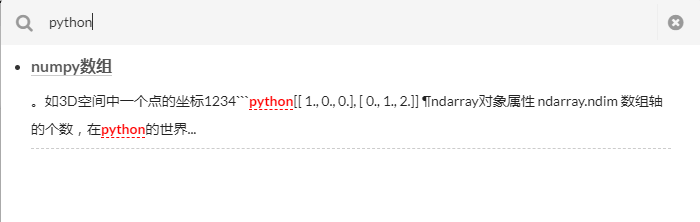
搜索效果演示如下
16. 修改markdown解释之后标题的字号的大小
- 修改
themes/next/source/css/_variables/base.styl中的font-size-headings-step
// Headings font size
$font-size-headings-step    = 2px
$font-size-headings-base    = 24px
$font-size-headings-small   = $font-size-headings-base - $font-size-headings-step
$font-size-headings-smaller = $font-size-headings-small - $font-size-headings-step
$font-size-headings-large   = $font-size-headings-base + $font-size-headings-step
$font-size-headings-larger  = $font-size-headings-large + $font-size-headings-step
- 修改
themes/next/source/css/_variables/Mist.styl中的font-size-headings-base
// Variables of Mist scheme
// =================================================
$font-size-headings-base = 26px
也可以直接在Mist.styl中加上$font-size-headings-step = 2px //改为自己想要的步长
针对如下的问题进行解决“2级标题”和“3级标题”看不出来有啥区别啊
参考链接如何更改字体?
17. 更换markdown解析和渲染插件---hexo-renderer-markdown-it 插件
- 卸载 Hexo 默认自带的 Markdown 渲染器
$ npm un hexo-renderer-marked --save
- 安装
hexo-renderer-markdown-it插件
$ npm i hexo-renderer-markdown-it --save
-
配置
hexo-renderer-markdown-it的所有配置,均在 Hexo 的网站配置文件_config.yml中进行配置。-
简单配置
hexo-renderer-markdown-it提供三种简单配置方式(配置级别)zero、default、commonmark。
在 Hexo 的网站配置文件_config.yml文件中配置以下内容:# Markdown-it config #markdown: 'zero' #markdown: 'default' markdown: 'commonmark'每种简单配置有其默认的一些设置。更多个性化配置,请参考:高级配置。
- zero:禁用大多数解析器功能。仅支持斜体和粗体,甚至不支持所有原始Markdown功能。
- default(GFM):解析器的行为类似于github规范。
- commonmark:提供比Zero预设更多的功能。 此设置将强制插件使用最新的CommonMark规范。
警告:选择一种简单配置,将阻止您使用任何附带的插件。
-
高级配置
hexo-renderer-markdown-it提供的高级配置,是对简单配置的详细定制。在 Hexo的网站配置文件_config.yml文件中配置以下内容(官方提供的完整配置,没有特殊需要不用再次修改):# Markdown-it config markdown: render: html: true xhtmlOut: false breaks: true linkify: true typographer: true quotes: '“”‘’' plugins: - markdown-it-abbr - markdown-it-footnote - markdown-it-ins - markdown-it-sub - markdown-it-sup anchors: level: 2 collisionSuffix: 'v' permalink: true permalinkClass: header-anchor permalinkSymbol: ¶渲染器(render)
markdown: render: html: true xhtmlOut: false breaks: true linkify: true typographer: true quotes: '“”‘’'- html:定义文档中的HTML内容是否应转义或传递给最终结果。
html: true # 不转义 HTML 内容 html: false # 转义 HTML 内容,使标签作为文本输出- xhtmlOut:定义解析器是否将导出完全兼容XHTML的标记。
xhtmlOut: true # 必须使用完全的 XHTML 代码,换行必须为 <br/> xhtmlOut: false # 不必必使用完全的 XHTML 代码,换行可以为 <br>- breaks:使源文件中的换行符被解析为
标记。每次按Enter键都会创建换行符。
breaks: true # 每次会车换行相当于一个 <br/> 标签 breaks: false # Pa每次会车换行会被忽略- linkify:解析器能够将直接粘贴到文本中的链接内联。
linkify: true # 类似链接的文本,作为链接输出 linkify: false # 类似链接的文本,依然作为文本输出- typographer:可以替换常见的排版元素。
typographer: true # 替换常见的排版元素 typographer: false # 不替换常见的排版元素- quotes:单引号、双引号如何被替换
quotes: '“”‘’' # 'single'、"double" 变成 ‘single’、“double”
quotes: '«»“”' # 'single'、"double" 变成 “single”、«single»
插件(plugins)
hexo-renderer-markdown-it默认集成5个markdown-it插件markdown: plugins: - markdown-it-abbr - markdown-it-footnote - markdown-it-ins - markdown-it-sub - markdown-it-sup- markdown-it-abbr:缩写插件
*[HTML]: Hyper Text Markup Language *[W3C]: World Wide Web Consortium The HTML specification is maintained by the W3C.- markdown-it-footnote:脚注插件
basic footnote[^1] here is an inline footnote[^2](inline footnote) and another one[^3] and another one[^4] [^1]: basic footnote content [^3]: paragraph footnote content [^4]: footnote content with some [markdown](https://en.wikipedia.org/wiki/Markdown)- markdown-it-ins:插入插件(下划线插件)
++inserted++ => <ins>inserted</ins>- markdown-it-sub:下标插件
H~2~0 => H<sub>2</sub>O- markdown-it-sup:上标插件
29^th^ => 29<sup>th</sup>锚(anchors)
可能自己不会用,因此,没太关注这个功能
markdown: anchors: level: 2 collisionSuffix: 'v' permalink: true permalinkClass: header-anchor permalinkSymbol: ¶- level:生成 Heading ID 的标题等级
- collisionSuffix:Heading ID 重复时,数字的后缀
- permalink:'true',则创建一个锚标记,除标题外还有一个固定链接
- permalinkClass:用于固定链接锚标记的样式
- permalinkSymbol:用于固定链接标记的符号
-
参考链接
hexo-renderer-markdown-it 插件 详解